Showing posts with label dollar store. Show all posts

Saturday, October 19, 2013

DIY Candy Corn Halloween Paper Napkin Wreath

DIY Candy Corn Halloween Paper Napkin Wreath 15 minutes of your time and you will have this fun and easy to make #Halloween wreath! #halloweendecor #dollarstorecrafts
Hola Amigos! Just a quick craft for the weekend if you want to give your house a festive touch for Halloween! You guys already know the drill with this wreath since we have made quite a few already (here and also here), but that is the thing, it's so easy, cheap and you get instant gratification is hard to just stop at just one!

If you have a small apartment, a dorm, or a big house but you are really not into the whole Halloween thing but a touch of magic in your home, this is the craft for you! Other than the napkins from your Dollar Store, you just need a few Halloween elements and you are set!


Nothing says Fall and Halloween like Candy Corns! These little bites of sugar now come in all flavors and textures, even gummies, so why not a wreath, it doesn't have to be perfect,the real ones aren't, and we are just representing them on this wreath with their characteristic colors.
DIY Candy Corn Halloween Paper Napkin Wreath, #Halloween decor for only a few#halloweenwreath

As always this is a quick accent for indoors or outdoors, just keep in mind is paper and lately it has been raining and we are expecting the "S" word (snow) soon, so if you don't have a covered porch or the wind brings water to your door, use it inside only.

Happy weekend my friends! Only 11 days left for candy palooza! I still need to get or make a costume for my little one but...and by the looks of it, I'll be putting it together on the 30th since my little monster can't decide what he wants to be! In the meantime I will make more wreaths and dream about candy.
Besitos, 
Lizy

Sharing some paper candy corn at these Fa-BOO-lous parties:
Sewlicious Home DecorClassy ClutterSuburbs MamaTwigg StudiosLife on Lakeshore DriveThe TablescaperFrugal Foodie MamaNavy Wifey PetersTiti CraftyThe Velvet Moon BakerYour Home Based MomFlamingo ToesNifty Thrifty ThingsDIY Show OffVMG206Huckleberry LoveCraft-O-ManiacSumo's Sweet StuffUnder The Table and DreamingThe Chicken ChickI Should Be Mopping the FloorsThis Gal CooksCarrie This HomeDIY Home Sweet HomeThe Plaid and Paisley KitchenMad in CraftsWatch Out, Martha!A Pinch of JoyFeeding BigThe Gunny SackOur Table for SevenChef in TrainingMemories by the MileLove Bakes Good CakesNot Just a HousewifeBetween Naps on the PorchLady Behind the CurtainSmart School HouseGinger Snap CraftsSomeday CraftsThe Shady PorchMade to be a MommaReal Housewives of RivertonPolkadots on ParadeKitchen Meets GirlSNAPDucks' n a RowPink Recipe BoxThe Well Crafted HomeLive Laugh RoweThe Crafty BlogstalkerLamberts LatelyMade in a DayThe Mandatory MoochJennifer RizzoGingerly MadeSparkles and a StoveMy Turn (for Us)Simply Dream and CreateThe Girl CreativeThe Best Blog RecipesCraftionaryMy Life in PencilPractically FunctionalMy Personal AccentToday's Creative BlogSweet HauteThe Patriotic Pam504 MainKitchen Fun with my 3 SonsThe Answer is ChocolateSix Sisters StuffCheerios and LattesMade From PinterestCraft DictatorWill Cook For SmilesBowdabraSew-LiciousLemon Paper DesignsSerenityYouNap Time CreationsHome Stories A to ZKathe with an ECozy Little House52 Mantels

CoconutHeadGet Your Crap Together

Monday, September 23, 2013

DIY Halloween Ghost in the Mirror

DIY Halloween Ghost in the Mirror, a 1-2-3 craft! Just 3 things and less than 3 dollars are needed to achieve this ghostly image for your Halloween Decor
Hola Amigos! Sharing with you a quick craft I made last year in the also known as the Before Blogging Days!, not as many pictures but this craft is so easy that not as many are needed anyway!

What I Used: You only need 3 things to make this craft. Head to your Dollar Store and get yourself a framed mirror, a printed image from your computer, preferably black and white and some Oven Cleaner.
How I did it: Take your mirror apart, set the frame aside. On a kitchen towel or old rag, place your mirror upside down (reflective side down) leaving the dark side exposed. Spray some oven cleaner over it and let it sit for a couple of minutes. I tried several times and with the particular oven cleaner I used it took me 15-20 minutes for it to work. Using a soft towel or old rag (a disposable one because you won't be using this one again) wipe some areas of your mirror, not everything, leave some areas with the dark backing so when you turn it around you could still see your own reflection, like a mirror. Make sure it's dry and with no residue of cleaner before you continue with your craft.
Cut the printed image to fit your frame and put it right behind the mirror already  on the frame. When you turn it around you will be able to see the printed image coming from behind the still reflecting mirror. Cover it up with the back (stand) of the mirror and you are done! Enjoy the spookiness.
DIY Halloween Ghost in the Mirror, Just 3 materials and less than 3 dollars create this spooky look, making it the ideal Halloween Decor

Show as much or little of the image as you want. I happened to like just the edges so I can appreciate Miss Borden's face better. I'm really fond of her. maybe because we share the same name (Lizbeth)  and actually I think she was innocent of what they accused her.

Too bad they didn't have an "Agent Gibbs" or the people at the  CSI  L.A. unit to investigate and clear her name. She has a place of honor on my living...lighting is very bad there..I can't get a decent picture, so I apologize.

I guess we are ready now to start singing that creepy nursery rhyme....Lizzie Borden had an Axe.....I'm not going to sing the whole thing because I don't want to scare you guys too bad, lol. Hope you like my little project and you try it this Halloween....can't get any easier than this for $1 or so! Have a healthy and productive First Week of Fall!

Besitos,
Lizy

Sharing my Little Ghost in the Mirror at these Fa-BOO-lous Parties:
The Blackberry VineFeeding BigRain on a Tin RoofSetting for FourHuckleberry LoveSay Not Sweet AnneThe Gunnt SackCoastal CharmLadybug BlessingsChef in TrainingMandy's Recipe BoxHome Stories A to ZOur Table for SevenUnder the Table and DreamingDIY Home Sweet HomeMad in CraftsA Southern FairytaleJembellishSugar Bee CraftsNap Time CreationsMemories by the MileCozy Little HouseThe Well Crafted HomeDucks'n a RowThe Everyday HomeThe Shady PorchGinger Snap CraftsLady Behind the CurtainFluster BusterThis Silly Girl's LifeTrendy Tree HouseKitchen Meets GirlSNAP733 BlogThe Real Housewives of RivertonPolkadots on ParadeSomeday CraftsWe Like to Learn as We GoMy Girlish WhimsSmart School HouseThe 36th Avenue52 MantelsThe Mandatory MoochSweet HauteSaving 4 SixLamberts LatelyWhat's Cooking LoveA Handful of EverythingLive, Laugh, Rowethe Crafty Blog StalkerKatherines CornerThe Best Blog RecipesThe Best Blog RecipesCraftionaryTidy MomThe Girl CreativeOne Tough Mother,Kitchen Fun with my 3 Sons504 MainCraft DictatorDo Small Things with LoveDiana RamblesSara HowePlanned in PencilLiving Better TogetherThe Jenny EvolutionShaken TogetherThe Pin JunkieFrugal Fit FamilyTatertots and JelloSerenity YouClassy ClutterWho Needs a CapeCheerios and LattesToo Much TimeTwigg StudiosLife on Lakeshore DriveWCFSYour Homebased MomMommifriedThe Thriftiness MissUnder the Table and DreamingDear CreativesFlamingo ToesI Should be Mopping the FloorsFrugal Foodie MamaBetween Naps on the PorchMade in a DayMade from PinterestDIY ShowoffMy Love 2 CreateSix Sisters StuffCarrie This HomeDIY Show OffBowdabra
Get Your Crap TogetherCoconutHead


Wednesday, August 14, 2013

DIY Pencil Gumball Machine Teacher's Gift

DIY Pencil Gumball Machine Teacher's Gift, turn your favorite pencil into a Gumball work of art. Resembling a No.2 pencil, this gumball machine will bring a smile to your child's teacher for sure!
Hola Amigos! A quick and budget friendly craft for kids to give their favorite teacher for this new school year about to start soon. It's a DIY "Pencil No.2"  Gumball Machine made with materials available at your nearest dollar store.

This would be the 3rd time I've changed my Gumball machine, just to give you an idea of how versatile this project is! Here it is all dressed up for St. Patrick's and here ready to welcome Easter!
What I used:  1 dollar store fish bowl, 1 terracotta pot with 2 saucers one the one smaller than the other, Assorted paints, yellow, grey, green and pink,to resemble a pencil, gumballs or any other candy you will see appropriate, adhesive letters and numbers to spell No.2., hot glue gun or glass cement.
How I did it: Paint your terracotta pot in the same order of colors of a No.2 pencil. Once the paint is dry, add your letters (or you could paint them too!) to the bottom of the yellow pot. If you recalled, I suggested 2 saucers, 1 smaller than the other, you see, the smaller saucer will go on the inside of the bigger one and once we used this one as a "lid" for our gumball machine it will stay in place! The way you attached the fish bowl onto the bottom of the terracotta pot is by gluing it's bottom with hot glue or glass cement. Fill your gumball with candy, add any other embellishment to the lid and you are ready!
DIY Pencil Gumball Machine Teacher's Gift, this cute "Gumball Machine" will bring a smile to your child's teacher face. Fill it up with candy, cookies, paper clips, your choice, it would look great on her desk!

Isn't it the cutest thing? as I mentioned before add age appropriate candy, cookies or even why not, erasers or colorful paper clip or rubber bands!  This is only to inspire you, your imagination is the limit.

I hope I have inspired you with this easy craft and consider it as a little sweet gesture from your child to the one person he/she is going to be seeing a lot for the next few months keeping their young minds sharp!
DIY Pencil Gumball Machine Teacher's Gift, give this cute "gumball machine" as a nice to meet you gift to your child's teacher. It will look great on her desk with candies, cookies, paper clips or just by itself!

Besitos,
Lizy

Sharing some "gumball" fun at these Fabulous Parties:
Fine Craft Guild, Under the Table and Dreaming  The Real Housewives of Riverton733 BlogThe Brambleberry CottagePolkadots on ParadeWe made ThatSweet HauteThe Crafty Blog StalkerSaving 4 SixLamberts LatelyWhat's cooking, Love?The Mandatory MoochThe 36th AVENUEKatherine's CornerChocolate, Chocolate and More!Posed PerfectionHouse of the HepworthsKreative CreationzSparkles and a StoveArtsy Fartsy MamaLiving Well Sending LessDomestic SuperHeroCraftionary, Sis Sisters's Stuff Twin Dragon Fly DesignsMommiFriedCraftberry BushHappy Hour ProjectsTidy MomMy Turn (for Us)A Peek into My ParadiseThe Answer is ChocolateHappy and Blessed HomeThe Jenny EvolutionLiving Better TogetherBecoming MarthaA Simple Five, , Diana RamblesSimply DesigningChic in a ShoestringKitchen Fun with my 3 SonsThe Pin Junkie504 MainThe Triftiness MessJennifer RizzoBlissful and DomesticMy Personal AccentSunny Simple LifeNap Time CraftersAngels Homesteada Little ClaireificationCheerios and LattesBowdabraIt's OverflowingSix Sister's StuffMade from PinterestWCFSThe TablescaperLife on Lakeshore DriveA Pretty Life in the SuburbsRain on a Tin RoofHuckleberry LoveJembellishA Southern FairytaleMad in CraftsBetween Naps on the PorchCoastal CharmCupcake'n BakeWho Needs a CapeBoogieBoard CottageThe Blackberry VineSay Not Sweet AnneMy Mixing SpoonFeeding BigSetting for FourHome Stories A to ZHandmade CuddlesLadybug BlessingsNap-Time CreationsKathe with an EAdventures of a DIY MomSummer ScrapsThe Princess and her CowboysSugar Bee CraftsOur Table for SevenMemories by the MileNot Just a HousewifeBebetsy, DIY Vintage Chic The Lady Behind the CurtainThe Everyday HomeSmart School HouseDucks'n a RowCrystal and CoMade to be a MommaThank You HoneySomeday CraftsThis Silly Girl's LifeWe Like to Learn as We GoThe CSI ProjectReal CoakeCraftin Desert DivasSew Many Ways

Visit thecsiproject.com


Another Gumball Machine you might enjoy:
Kiss Me DIY Gumball Machine

Tuesday, August 6, 2013

Back to School "Bus Stop" Paper Napkin Wreath

Back to School Bus Stop Paper Napkin Wreath, get your little ones excited about that first bus ride of the year with their own wreath, for only $3.00 I'm sure you already have most of the things you need to bring happiness to your kids face!
Hola Amigos! Today I'm sharing with you one of my favorite projects because it's so easy and frugal to do, a paper napkin wreath! I have to confess that deep inside I've been avoiding everything school related since I'm about to loose my now companion and shadow for 5 years to Kindergarten! Yup, my little man is going to K this year...I know he has to...it's part of life...but do I want to let go...NO! He is ready but I'm not. But as a good parent I need to put my best face on, be cheery and encourage him to embark in this new adventure the best way possible!

We are bringing cheer to his room with this cute wreath. You pretty much know the basics by now since you have seen my Picnic Paper Napkin Wreath. It's basically the same for this one.
What I used: 1 grapevine wreath, 1 pack 20 paper napkins, a few embellishments from the Dollar Store, 1 piece of cardboard box ( I used the back of one of the embellishments pack) 1 STOP print out.

How  I did it: Take your napkin, open it up until you have a square and twist where the middle of the square is. now just stuff it in the grapevine wreath until is full to your liking, I used about 18 napkins but if you want a fuller look, by all means use more. Embellish your wreath anyway you want and enjoy your work!
This whole wreath cost me $3.00 I had the wreath already and only use mu $1 napkin bag, $1 toy bus and $1 pencil flags! Cool huh?
Back to School Bus Stop Paper Napkin Wreath, make your little one back to school season exciting with his/her own Bus Stop Wreath for only 3 dollars!

It was done quite fast too, about 30 minutes, I had to wait a little to the glue to dry on my cardboard for the stop sign.

This is my first project for the school season. I'm sure it won't be the last since my little boy is so excited. I just wish I was as excited as he is. Gotta be brave though, lol...still a couple of weeks for the Big Day and I'm holding on to every minute of summer I can!
Back to School Bus Stop Paper Napkin Wreath, make the first bus ride of your little one exciting with this super easy and frugal wreath, only 3 dollars and so colorful!

Thank You so much for your visit my friends. Hope you enjoy another one of my cheap but colorful crafts! I certainly have a happy camper on my end! Have a great day!

Besitos,
Lizy

Sharing my "Bus Stops Here" Wreath at these Fabulous Parties:
Smart School HouseMade to be a MamaGinger Snaps CraftsClean and ScentsibleFluster Bustera Peek Into my ParadiseThe Shady Porch Lady Behind the CurtainMy Girlish WhimsAdorned from AboveDragonfly DesignsCreations by KaraDIY Craft ProjectsThank You HoneyWorthing CourtLife with the Crust Cut OffThe 36th AvenueFine Craft GuildSew Much AdoSomeday CraftsHandy Man, Crafty WomanThe Real Housewives of RivertonSNAP!The Crafty Blog StalkerWhat's Cooking LoveSaving 4 SixLive, Laugh, Rowe52 MantelsThe Mandatory MoochThe Brambleberry CottagePolkadots on ParadeSouthern LovelyKatherines CornerHouse of HepworthsLamberts LatelyThe Style Sisters,Living Well, Spending LessMy Joy filled LifeFood Done LightSew Much CraftingKitchen Fun with my 3 SonsCraftionaryThe Best Blog RecipesTidy MomMy Romantic HomeFrench Country CottageHappy Hour Projects504 MainLove and LaundryA Simple FiveLiz Marie BlogBecoming MarthaHappy and Blessed HomeThe Pin JunkieLiving Better TogetherThe Answer is Chocolate A Peek into my ParadiseMy Turn (for Us)Le Chateau des FleursChic on a ShoestringClaire Justine oxoxSerenity NowSix Sister's StuffCheerios and LattesCooking with Curls4 Little FergusonsJust Us FourAngels HomesteadTumbleweed ContessaFun-A-DayLife on Lakeshore DriveSuburbs MamaThe TablescaperThe Foley FamTwigg StudiosVMG206Flamingo ToesThrifty Nifty ThingsTartertots and JelloClassy ClutterToo Much TimeMommy Mentionables, Craftin Desert Divas WCFStwelveOeightTitiCraftyFrugal Foodie MamaClaire Justine oxoxNavy Wifey PetersCraft-o-ManiacSumo's Sweet StuffLines AcrossThe Chicken ChickSay Not Sweet AnneFlour Me with LoveCupcake-n-BakeThe Plaid and Paisley KitchenJembellishSew Can DoKeeping it Simple CraftsBoogieboard CottageDIY Home Sweet HomeUnder the Table and DreamingBetween Naps on the Porchthe Princess and her CowboysThe Tumbleweed ContessaKathe with an ECoastal CharmThe Blackberry VineLadybig BlessingsHandmade CuddlesRain on a Tin RoofSetting for FourHuckleberry LoveChef in TrainingLove Grows WildSugar Bee CraftsNap-Time CreationsPowerful MotheringAdventures of a DIY MomNot Just a HousewifeMemories by the MileShaffer SistersCrystal & CoWe Like to Learn as We GoCozy Little HouseFeeding BigWe Made ThatSweet HauteDomestic SuperHero, DIY Vintage Chic MommiFriedDiana RamblesSimply Designing504 Main,Sunny simple LifeIt's OverflowingSix Sister's StuffMade from PinterestA Pretty Life in the SuburbsThe CSI ProjectSew Many Ways
Visit thecsiproject.com


Other Napkin Wreath you Might Like:

Tuesday, July 2, 2013

S'mores Pizza Recipe

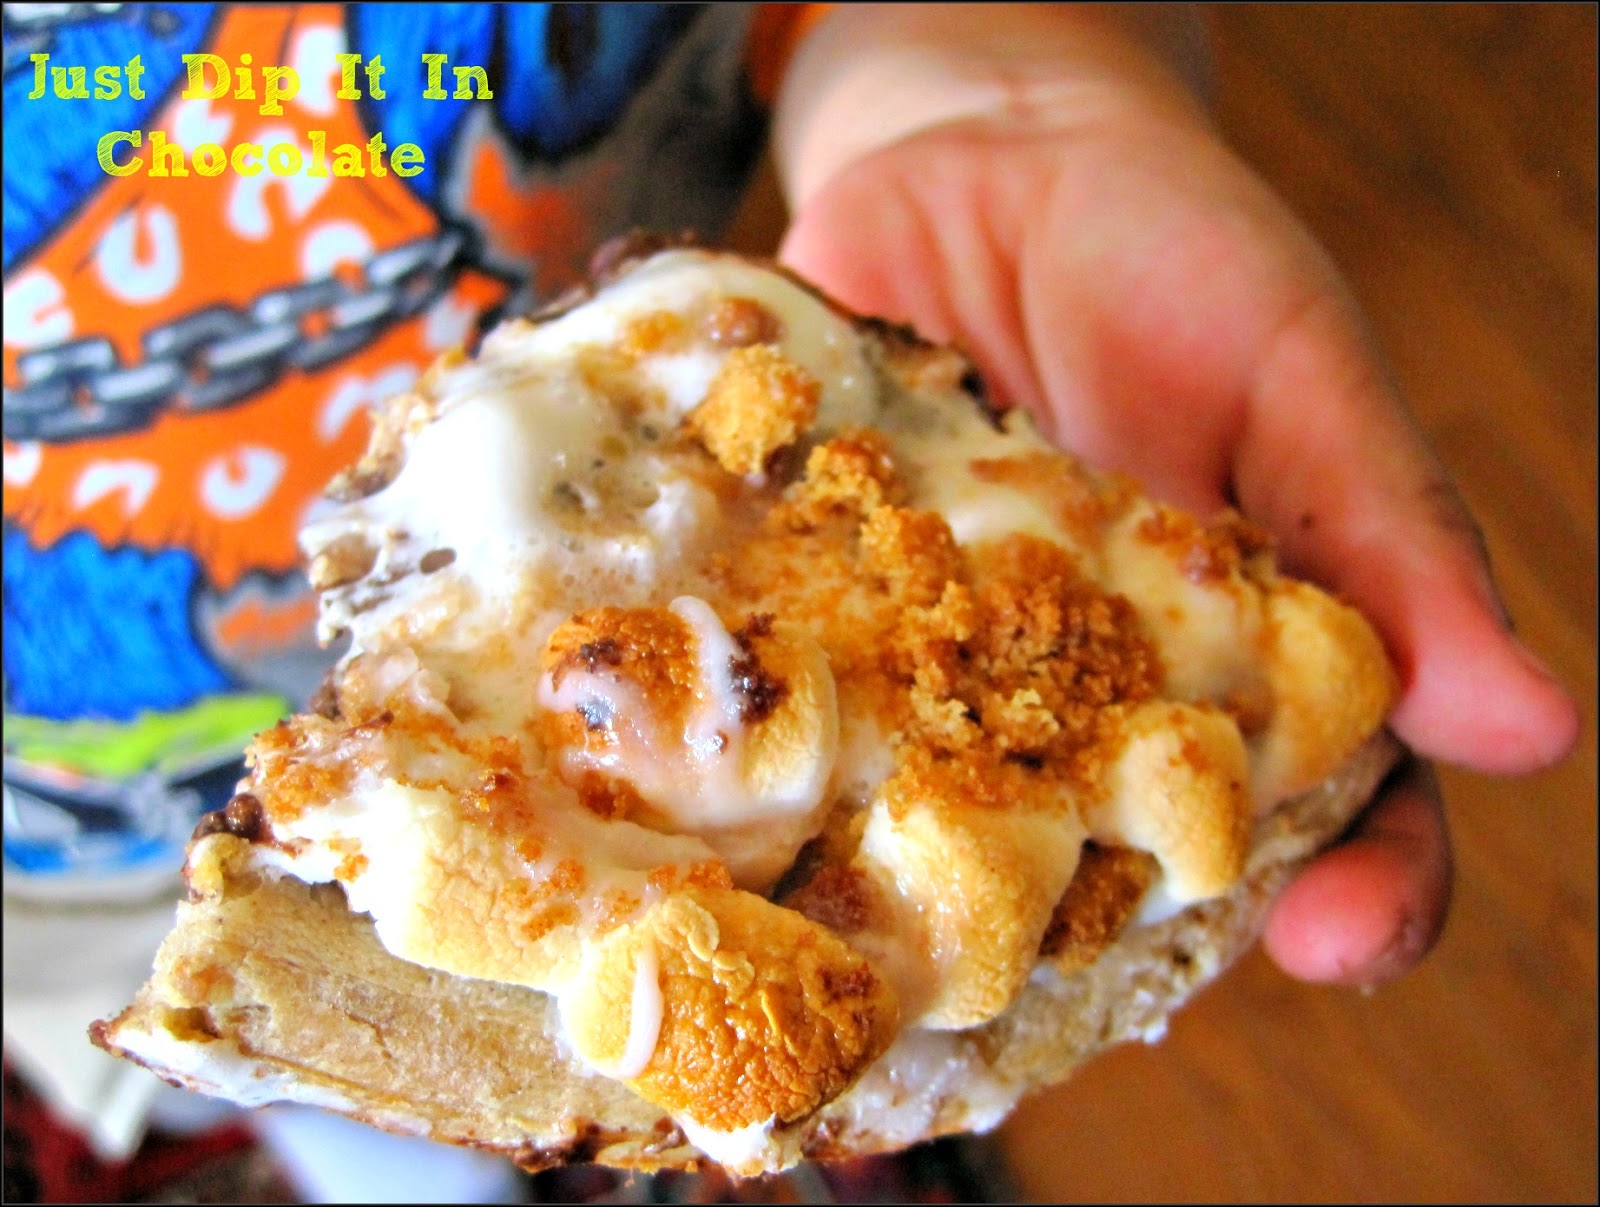
S'mores Dessert Pizza, a Cinnamon Crust covered in Chocolate and Marshmallows done in 3 minutes!
Hola Amigos, as you can see, I just couldn't stop with the Apple Pie Pizza, but had to do a S'mores one too! So without further ado, here are the easy steps...(there is really not a recipe here)

S'mores Pizza

1 Cinnamon Crust with Icing
1( 3.5oz)  Chocolate Candy Bar of your preference
Mini Marshmallows
Crushed Candy'n Cookies or your favorite
All my ingredients are  from the Dollar Store


Heat up your oven at 450F. Remove the cinnamon pizza from the wrap. 
Cut the chocolate candy bar and spread the squares and pieces on top of the pizza. Put in the oven for 3 minutes. Remove and with a plastic spatula spread the melted chocolate over the Pizza. Top it with marshmallows and crushed candy cookies.

Bake for another 3 minutes.
This cinnamon pizza comes with a little container of sugar glaze, so I put it in the microwave for a few seconds for it to melt and then drizzled it over my baked and ready to eat pizza.

Listo!

Ohhh no need for a grill here! This is just a sweet and good as the original stuff!

Watch it when you take the first bite...Hot, Sticky Sweet and Oozing Hot Chocolate!


This was just a quick idea for you to do with and for your kids my friends, in days when it might be too hot to go outside or no desire to grill at all! In 7 minutes you have a perfectly good S'more!

Thank You for visiting today, remember that everything tastes better with Chocolate and a Pinch of Love!
Besitos,
Lizy

Bringing some sweetness to these Fabulous Parties:
Golden Reflections
Bowdabra
Sweet 2 Eat Baking
Spatulas on Parade
A Little Claireification
VMG206
Rattlebrige Farm
Simply Designing
Living Better Together
My Turn (for Us)
Love and Laundry
Handy Man, Crafty Woman
Ducks'n a Row
Adorned from Above
Dragonfly Designs
Clean and Scentsible
The Plaid and Paisley Kitchen
Cozy Little House
Memories by the Mile
Hun...what's for dinner
Pint Sized Baker
I Gotta Try That
Our Home Away from Home
Love Bakes Good Cakes
Opulent Cottage
Fluster Buster
Mom's Test Kitchen
Family Home and Life
This Silly Girl's Life
Real Coake.com
Sparkles and a Stove
French Country Cottage
My Romantic Home
Do Small Things with Love
Kitchen Fun with my 3 Sons
Dear Creatives
Diana Rambles
The Mandatory Mooch
Kreative Creationz
Let's this Mind be in You
The Home Girl
Just Us Four
Desert Now, Dinner Later
The Wondering Brain
Sew Licious Home Decor
Debbiedoo's
Classy Clutter
Serenity You
Life on Lakeshore Drive
Nap time Creations
Love Grows Wild
Feeding Big
Chef in Training
The Princess and Her Cowboys
Home Maid Simple
The Answer is Chocolate
It's Overflowing
Be Different, Act Normal
Chocolate Chocolate and More
I Should be Mopping the Floors
Designed Decor
Rate The Plate Utah
Something Swanky
This and That

Monday, July 1, 2013

Apple Pie Dessert Pizza Recipe

Hola Amigos! I'm so disappointed at myself for not having 1 single decoration or something special for the 4th of July! Shame on me! I honestly just haven't got a chance to sit down and craft anything! What I've been doing a lot of is cooking and just had a literal "last minute thought" and decided to cook up something to celebrate such a magnificent date.
What is more representative of our American Culture than Apple Pie! Songs, Poems, Sayings have been created around this little pastry, so I think it deserves a place of honor in the upcoming celebration!
Keep in mind this is last minute and was made with things I had at hand. No major baking or preparation, but  easy and quick ....just one thing though, don't say it out loud because your guest are not going to believe you when you tell them how you put it together!
All of the items, but the apples came from the Dollar Store! oh yeah baby, one of my favorite places ever! Who says you can't create deliciousness on a budget! Here is the recipe.

Apple Pie Dessert Pizza 
1 Personal  Pre Made Cinnamon Crust
1 Green Apple Cubed
3 TBSP Brown Sugar
1 half of  a Lemon juiced
1 tsp flour
1 TBSP Cinnamon Applesauce (optional)
1/4 tsp Cinnamon or more to taste
1 Pinch Nutmeg
A handful of crushed Candy'n Cookies or your favorite 
Mini Marshmallows 
Caramel topping or Caramel Candies
Note: Ingredients are for 1 personal pizza, just double for more.

Heat oven at 450F.
Combine your cubed apples with all the ingredients except the crushed cookies, marshmallows and caramel.

Bake this mix in an oven resistant bowl for 10 minutes. Test for doneness of the apples after this time, depending on your oven or personal taste if you like them mushier bake them some more.
Remove your Pizza from the wrapping and place the hot apple mix on it. Top it with the crushed cookies and bake at 450 for 3 to 3 1/2 minutes. Remove and top it with your marshmallows, place the pizza back in the oven  for the marshmallows to get brown,  for an additional 2 minutes.

Remove from oven, let it cool for 1 minute and serve!
Listo,

I melted some Vanilla Caramels that I had around with a little bit of heavy cream and drizzle this mix on top of my marshmallows!

Delish!!!!
As you can see friends, I'm sure you have every thing you need for this recipe in your pantry, fridge or purse (yeah.....I carry a bag of chocolate and caramels in my purse...don't judge, lol) with the exception perhaps of the cute mini cinnamon crust from the dollar store.
It's crispy and sweet at the same time!

Between prep and cooking time I'll say your personal Apple Pie Pizza is done in 20 minutes! Isn't that fantastic?

With a glass of milk or vanilla ice cream it's delicious!

Hope you enjoy my little Apple Pizza Pie! It was fun to make and delicious to eat!
Happy Birthday America! and remember that no matter where you reside in this beautiful country of ours, if you are overseas or if you are not american by birth but believe in the values and people of this great country, everything tastes better with a Pinch of Love!

P.S here is a sneak preview of the tomorrow's post, wink, wink

Besitos,
Lizy

Joining the Patriotic celebrations at these Fabulous Parties:
Golden Reflections
Bowdabra
Sweet 2 Eat Baking
Natasha in Oz
Rattlebridge Farm
Living Better Together
My Turn (for Us)
Handy Man, Crafty Woman
Ducks' n a Row
Adorned from Above
Dragonfly Designs
Clean and Scentsible
The Plaid and Paisley Kitchen
The Dedicated House
Feeding Big
Tasty Tuesday's
Cozy Little House
Memories by the Mile
Hun...what's for dinner
Pint Sized Baker
I Gotta Try That
My Home away from Home
Love Bakes Good Cakes
Opulent Cottage
Fluster Buster
Mom's Test Kitchen
Family Home and Life
This Silly Girl's Life
Real Coake.com
Sparkles and a Stove
French Country Cottage
My Romantic Home
Love and Laundry
Do Small Things with Love
Kitchen fun with my 3 Sons
Simply Designing
Dear Creatives
Diana Rambles
The Mandatory Mooch
Krative Creationz
Let's this Mind be in You
The Home Girl
Just Us Four
Dessert Now, Dinner Later
The Wondering Brain
Sew Licious Home Decor
Classy Clutter
Serenity You
Chef in Training
Life on Lakeshore Drive
Kathe with an E
Sugar Bee Crafts
Love Grows Wild
The Blackberry Vine
Golden Reflections
Designing Dining + Diapers
Townsend House
twelve o eight
Pursuit of Functional Home
Happy and Blessed Home
Liz Marie's Blog
A Simple Five
The Shabby Nest
It's Overflowing
I Should be Mopping the Floors
Designed Decor
Foodie Friends Friday
Sew Many Ways