I was hoping for the colour purple. It didn't happen. To be honest, I kind of expected it. I'm friends with the lovely lady selling preserves at our local farmer's market. Late last year I found a jaboticaba jelly on her stand and I grabbed it. The jaboticaba is a Brazilian tree grape with a deep purpley skin. And the jelly is what colour you may ask? Not purple. So I had an inkling my purple cherry wasn't going to give me the colour for which I yearned.
As for the taste. I'm happy. Subtle with absolutely no hint of bitterness or sourness. You have to be careful with lilly pillies. If picked too early they can be awfully sour. Not this one. I had a taste. It was slightly acidic but refreshingly pleasant. Much milder than the pink or red varieties.
This led me to reassess the amount of sugar I would put in. I decided I wouldn't do the usual one cup sugar to one cup liquid. I reduced the quantity of sugar and this allowed the flavour of the purple cherry to really come through. It wasn't dominated by the sugar which can often happen with sour fruit when too much is added in an effort to eliminate the souriness. I did this last year with one batch of my red lilly pilly. It was way too sweet and the flavour was completely lost. I ended up dissolving the whole batch with hot water, and turned it into a cordial. Funnily enough, the flavour came through as a cordial but not as a jelly. Strange.
The other surprise I had was with the jelling of this fruit. I have never before achieved such a jell. I mean so firm and fast set. Hardly a wobble. It reminded me of the real turkish delight. You know the rosewater jelly squares tossed in icing sugar.
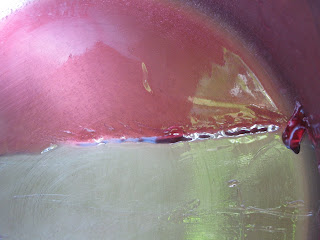 |
| The jell set in the pot very quickly. |
I did some troubleshooting and this is what I came up with;
- perhaps the fruit already contained a lot of pectin.
- I added lemon juice twice; once to the fruit when cooking and then again to the strained liquid.
- The lemons were greenish and picked straight from my tree so the pectin would have been at it's highest peak.
- I used a couple of apples when cooking the fruit. The storeholder at the market said they were picked the day before and with the apple season just starting, I guess the pectin levels in those would have been really high as well.
All in all, I can only summize that the acidic levels were too high.
Am I disheartened with my jelly? Not on your nelly. As with everything, it's all a learning experience. And a talking point. Especially the lengths we went to in
acquiring them. I am reminded of this everytime I look at my jars. They make me smile.
My helpful boy and I begin the arduous process of filtering through and sorting the goodies from the baddies. It took ages.
 |
| The baddies |
 |
| The goodies |
In a large, heavy based stainless steel pot, I added:
1.9kgs of thoroughly clean and unbruised purple cherry fruit
350gm wedges of unpeeled apple (as freshly picked as possible) - pips, stem and all
1 freshly picked lemon which produced 45 ml lemon juice - add the pips too
Put in enough water to just cover the fruit. Press with your hand to ensure the top level is reached as the fruit will otherwise float. This lilly pilly was much lighter than the other varieties, so be mindful.
Cover with lid; bring to boil; simmer steadily for 20 minutes. I lifted the lid after 5 minutes to discover the colour was completely stripped. The signs were early. The colour was not "hardy" and had already leached into the water. With the red lilly pilly it takes a lot longer to "lose" the colour.
After 20 minutes, use your wooden spoon or even a potato masher and give the mixture a good smashing. Just to break it up a little. This helps to release the flavours, the pectin and any remaining colour.
Replace the lid; continue to simmer for another 20 minutes.
Pour into a double muslin lined colander placed inside or over a large bowl.
I used my rolling pin to which I tied the muslin using some twine. Make sure the twine is strong because it will need to support all this weight. Tie a couple of times if necessary.
Place overnight in a cool, safe spot. I placed my rolling pin between two chairs. I also emptied the liquid in the above picture into another glass bowl as the muslin bag was almost touching the liquid. By the following morning I only had about another cup. Most of the liquid will definitely come out when you initially secure it. Whatever you do, don't squeeze the bag. It really will come out cloudy if you do and we are trying to achieve a nice, clear jelly - so don't be tempted to do this because you think you will extract more liquid. You will, but you risk losing your clarity and you'll make your jelly work harder with the extra scum it needs to remove.

I ended up with 1.180ml of strained liquid. I placed this back into my heavy based pot along with another 40 mls of freshly picked and squeezed lemon juice. Bring slowly to almost a boil. Take off the heat. I added 750gm caster sugar. Don't just dump it in. I carefully poured the sugar into the centre so it didn't splash all up along the sides of the pot. It's important to dissolve it well in order to prevent any crystallisation occurring. A bit like toffee I suppose. I used my wooden spoon to carefully stir through the sugar. Return to a gentle heat and continue stirring until the sugar is totally dissolved. I did this for about six minutes. Just to be sure. Turn your hotplate to it's highest setting and allow to rapidly boil.
The above picture was taken after 5 minutes of rapid boiling.
Using a long metal spoon, remove the scum away from the sides of the pot. It should be browny in colour like the above picture. If it's white then you may be removing the good stuff.
Another surprising thing - I hardly had any scum at all in this jelly. I usually have quite a bit in the red and pink lilly pillies. Perhaps because of their beardy bits - I'm really not sure on this one, but definitely less scum with the purple variety. Great.
Almost 20 minutes boiling and we're nearly there. Notice the gorgeous cerise colour coming through and the scum has risen and settled around the sides. That means it's away from our jelly - perfect.
I do the jell test and I'm amazed. I've never seen anything like it. The jell is setting on the spatula. It's spectacular. At this point I am so thrilled. It's been worth it. The boiling process in all took 22 minutes. It varies every time, which is why it's important to do the jell test when you see the liquid foaming up high and making a "plopping" sound. It means the jelly is just about there. And as you see from my pic above - I'm there.
There are plenty of websites describing how to sterilize jars. Check them out if you aren't sure how to do this. Using a paper towel thats been wrung out in boiling hot water, I wiped away the scum from the direction inwhich I intended to pour. This way the jelly didn't collect any of the scum. I poured the jelly into a hot, glass jug and straight away I poured this into my sterilized heated jars. Lid immediately. I filled three little 40ml jars, three 100ml jars, one 190ml jar and I had about a cupful I placed into a bowl. Sure it's a lot of work. Probably for not much gain. But the process is wonderful and I learn something new every time. It's hard not to feel satisfied.