Thursday, March 31, 2011

Oreo Cupcakes

I created a new and fun cupcake.
The Oreo Cupcake.
It is fun because it is full of surprises.

The swirls of cream cheese frosting.
The hidden chunks of oreo cookies inside the cupcake.
The surprise half oreo on the bottom (with the double stuffed cream filling left on for extra delicious-ness).
It looks so pretty when you peel off the paper.
And tastes amazing when you bite into it.

I even had a chef tell me that "these are the best cupcakes I have ever eaten."
That is saying something.
Everything is better with an Oreo. ♥
Even cupcakes.


Double Cornbread


"I once read cooking is something you do for your family. But when you’re alone you sometimes have to treat yourself like family. And now that my apartment’s redolent with the smell of food it feels more like a home than a box where I hang my hat."

From the book, Waiter Rant by Steve Dublanica

The quote above is perfect for how I was feeling. I was eating some chili mixed with pasta, something I eat when I can't think of what to eat, and started craving cornbread. I love cornbread. I was alone, so it would be just for me. Did I really want to take the time to make a batch of cornbread just for myself? My husband doesn't even really like cornbread, so it would be just me eating the leftovers also.

Why is it that if someone else, say my husband, asked me to make it for him, done. Of course I'd make it for him. Why don't I have the same consideration for me?

So as a declaration to myself, as to say, "I am as deserving as another", I made the cornbread.

It hit the spot.

And I was happy.

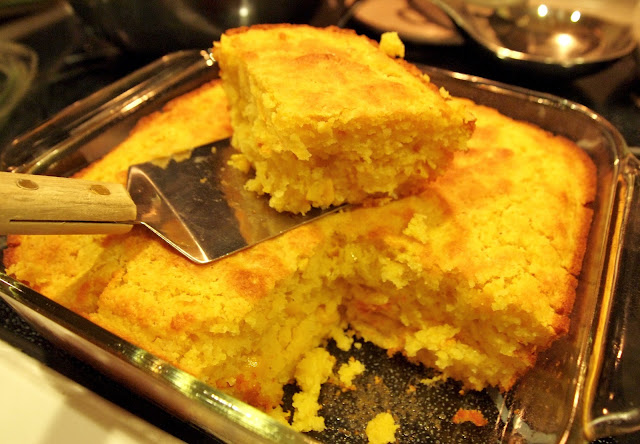
ready to go into the oven

This is my favorite cornbread recipe of all time. It's full of corn flavor and exceptionally moist. I've been making it for years. It comes from an old Mc Calls cookbook from the 60's I found at a Los Angeles thrift store. While living in L.A. pursuing my acting career, I didn't cook often. But every few months I would turn to this cookbook for recipes of old fashioned favorites like this.

I love this cornbread recipe so much I haven't made another since.


So if you are craving something and it's only for you, I recommend making it.

You're worth it.

Double Cornbread

makes one 9 inch square pan

adapted from a recipe from Mc Calls Cookbook

Ingredients

1 cup (150 g.) all purpose flour
1 cup (163 g.)  yellow cornmeal
4 tsp. baking powder
1 tsp salt
1/4 cup (47 g.) sugar
2 eggs
1 cup (250 ml) milk
3 Tablespoons butter, melted
1 can 15 oz. (430 g.) cream style corn

Directions

Preheat oven to 425 Fahrenheit, 220 Celsius, Gas Mark 7. Grease a 9x9 inch square pan.

In a large bowl whisk the flour, cornmeal, baking powder, salt and sugar together, set aside.

In another large bowl, whisk the eggs, then add the milk, melted butter and corn. Add the flour mixture and stir only until the dry ingredients are moistened. Don't over mix.

Spoon the batter into the prepared pan and bake for 35-40 minutes. Or until it passes a toothpick test.

Serve warm with butter and honey.

banana oat bread

It's been cold and rainy and all we've wanted to do was bake. This banana bread is made with whole wheat flour and oats, and lightly sweetened with maple syrup.
Banana Oat Bread
1 stick butter (1/2c), melted1/2c pure maple syrup2 eggs4 very ripe bananas1/2 c buttermilk1 tsp vanilla2c whole wheat flour1c whole oats (not instant)1/4 c ground flax seed1 tsp baking soda1 tsp salt
in separate bowl mix

Walnut, caramel and chocolate ganache tartelettes

Jag gör paj alltför sällan. Jag hittade ett recept på den fantastiska bloggen Tartelette som inspirerade mig (finns det något där som INTE är inspirerande?) att skapa något liknande. Jag gillar dessutom tanken på att göra många små pajer istället för en stor, så att alla kan få sin egen lilla paj. Det är lyx det!

Scroll down for recipe in English!


Pajskal med valnötter

Räcker till 6-8 st formar på 10 cm

Det går bra att lägga till 1-2 msk socker till receptet för att få en sötare deg


•2 dl mjöl
•1 dl malda valnötter (kan ersättas med mjöl)
•125 gram smör
•1 äggula
•2 msk kallt vatten


Blanda mjöl och tärnat smör i en bunke. Knåda ihop till en deg. Tillsätt äggula och vatten och blanda med fingrarna tills du får en jämn deg. Linda in degen i plastfolie och låt visa i kylskåpet minst 30 minuter.

Värm ugnen till 200°C.
Smör formarna med matfett. Kavla ut en tunn deg, cirka 3 mm. Stick ut rundlar som är en bra bit större än formen och lägg i formarna. Stick hål i bottnarna med en gaffel.
Klä insidan av formarna och degen med bakplåtspapper och fyll med ris eller torkade bönor. Grädda pajskalen cirka 10-12 minuter tills kanterna börjar få färg. Ta sedan bort bakplåtspappret med ris/bönor och grädda ytterligare 5 minuter.
Oanvända pajskal går bra att förvara i kylen några dagar.


Kolasås
Det här receptet ger mycket kolasås! Men varför inte göra extra mycket och ha till t.ex. glass?

•2 dl socker
•115 gram smör
•150 ml grädde

Värm socker försiktigt i en rymlig kastrull utan att röra. När sockret börjar smälta, bli brunt och bubbla, rör förstiktigt några varv med en sked. Se till att allt socker smält innan du tar bort kastrullen från värmen. Värm grädden i en annan kastrull.

Tillsätt smöret till det smälta sockret, skuret i bitar. Var försiktig så att det inte kokar över eller skvätter upp på dig! Till en början skär det sig, så sätt tillbaka kastrullen på låg värme på spisen och rör tills smeten blir jämn.

Tillsätt grädden, lite i taget. Var förstiktig här med, eftersom det bubblar riktigt mycket! Låt koka ett par minuter, ta sedan bort kastrullen från värmen och låt svalna en stund innan du häller upp i en ren burk. Förvara burken i kylen. Om den känns för hård när du ska använda den så låt den stå framme i rumstemperatur en stund.


Chokladganache
Räcker till att fylla cirka 4 st tarteletter

•1 dl grädde
•100 gram 70% choklad

Hacka chokladen och lägg i en värmetålig skål. Värm grädden i en kastrull. Ta av kastrullen från värmen precis innan grädden börjar koka. Häll grädden över chokladen och låt stå i någon minut innan du rör till en jämn smet.


Sätta ihop tarteletterna
Häll cirka 2 matskedar kolasås i varje pajskal. Sätt in dem i cirka 20 minuter i kylen. Häll ganache över kolasåsfyllningen tills du nästan når toppen på skalet. Låt stå i kylen i minst en timme innan servering.


In English:

I rarely make pie. I found a recipe on the fantastic blog Tartelette which inspired me (is there anything NOT inspiring on that blog?) to create something similar. I also like the idea of making several small pies instead of one big, so every person can have a pie of their own!

Flaky pie crust with walnuts
Makes 6-8 10 cm tartelettes
Add 1-2 tbsp of granulated sugar for a sweeter dough!


•2 decilitres (dl) all purpose flour
•1 dl ground walnuts (can be replaced with flour)
•125 grams butter
•1 egg yolk
•2 tbsp cold water

Mix flour and diced butter until everything comes together. Add the yolk and water and knead until you have a smooth dough. Wrap the dough in plastic wrap and put in fridge for at least 30 minutes.

Preheat the oven to 200°C and position rack in the center. Lightly grease the pans. Roll out the cold dough (about 3 mm thick) on a slightly floured surface. Cut out rounds that are bigger than your pans. Transfer the dough to the pans and make holes in it with a fork. Line the dough with a piece of parchment paper which you fill with dry beans or rice. Bake for about 10-12 minutes until the edges are golden brown. Remove the parchment paper and rice/beans and bake for another 5 minutes.
Unused baked crusts can be stored in the fridge for a few days.


Caramel sauce
This recipe makes a lot of caramel sauce! Why not save some for your ice cream?

•2 dl sugar
•125 grams butter
•150 ml heavy cream

Carefully heat the sugar in a saucepan withput stirring. Once the sugar starts melting and becomes a lovely amber brown color, swirl a few times. Remove from heat and swirl until all the sugar has melted. Heat the cream in another saucepan.

Add the diced butter to the sugar. Be very careful so you don't get caramel on yourself, it is HOT! Once the butter is added, it will start to curdle a bit, but just keep stirring and it will come together. Put the saucepan back on the heat.

Add the cream, a little at a time. Be careful, it will spit and spatter like crazy! Let the caramel boil for a couple minutes and then remove the pan from the heat. Let cool and then pour your lovely caramel into clean jars. Store in the fridge.

Chocolate ganache
Makes enough for 4 tartelettes

•1 dl heavy cream
•100 grams chocolate 70% (chips or chopped)

Place the chocolate in a heat proof bowl. Heat the cream in a saucepan until almost boiling. Pour the cream over the chocolate. Let stand for a minute before stirring. Whisk until the ganache is smooth.


Assembly
Pour 2 tablespoons of caramel in every tartelette. Put them in the fridge for about 20 minutes. Pour ganache over the caramel until you almost reach the top. Refrigerate for an hour before serving.

Wednesday, March 30, 2011

Drizzly Day In Paradise

"Prosuma Biogradska" in  Montenegro
We had a drizzly, wet walk through the beautiful Biogradska Gora National Park.  I took this picture In October when the water would have been at it's lowest level.  During April or May the water reaches it's highest peak and is crystal clear.  I can't begin to describe the sweet smelling air - it was so intoxicating.  You'll have to go there and find out for yourself.  I do think the moisture in the atmosphere helped to produce the amazing scent.  Apparently there is a phenomenal diversity of flora, trees and shrubs in this environment.   Several summits in this forest reach 2000 metres above sea level.   A truly spectacular place.

your kids eat what?!

It's been a few weeks since I've done one of our "Big Change" posts, so if you're just joining us, you can go back and see what has been talked about previously. 
We started out with becoming aware of our eating habits.Discussed my past romance with fast food.Talked about finding time for exercise and healthy eating.You'll often find me indulging, guilt free.Finding inspiration to cook.Fat

The Cemetery

One of my favourite photos in Montenegro
I felt a little unsure about posting this picture.  Scanning through all the cemetery shots, I kept coming back to this one.  I was reminded of a very special moment.  A moment like I have never before experienced in a cemetery.

Here in Australia, I was brought up where going to the cemetery required a certain demeanour.  To dress in black, to look sad (even if I wasn't feeling sad), to speak softly and to carry out rituals of which to this day I'm uncertain as to their meaning. 

So when in Montenegro my uncle and my aunt suggested one fine day we go the local cemetery, I was a bit hesitant.  I knew that I had to go at some stage.  I needed to pay my respects to my grandmother and my uncle.  My grandfather who was killed in the war has his name written on the memorial stone.  He died during the bombing of Bijelo Polje and his body was never recovered.  So his remains are not in the grave. 

It was a beautiful day.  The walk was pleasant, the views amazing and we even picked fresh walnuts from a tree by the roadside.  It was a four km walk.  The cemetery was in the most stunning position.  Set high upon a flat area of the mountain, it was peaceful, breezy and inviting.  I wandered all around.  My uncle showed Mitch and I the memorial stone of our family.  This was the picture I almost posted - but it just didn't feel right.

We spent ages looking at many of the graves and their stones. We constantly chattered.  Sometimes we stopped.  We tidied up some graves and some tears were shed for my aunt's side of the family.  Then we happened upon a huge concreted grave with no stone.  It belonged to my uncle and my aunt.  I recall my aunt telling my uncle to go inside and check it out to see if the structure was still in good condition.  My uncle asks Mitch to give him a hand to move the concrete slab which opened up at the base.  I didn't know what to think!  Am I supposed to be sad here or what?  I literally saw my uncle climb inside while my aunt sat on top yelling out questions to him. 

My uncle echoes back to us that he found a newspaper in there.  My aunt jokingly says, "good, it'll give you something to read when you go to live there permanently".  My uncle belts back "you'll be needing it before me".  My aunt says to Mitch and I, "quick, let's shut the door so he can't get out".   This friendly taunting of one another continued till my dear uncle crawled back out, replaced the slab and we all sat upon their final resting place. 

The jibing continued and I couldn't resist taking a photo of them.  My aunt said that she wasn't going to let Mitch go back to Australia and that there was room for him directly "down under" too.   Far from sadness,  I experienced laughter, joy and love on top of the mountain in the Potrk cemetery.  I had a wonderful day.

Tuesday, March 29, 2011

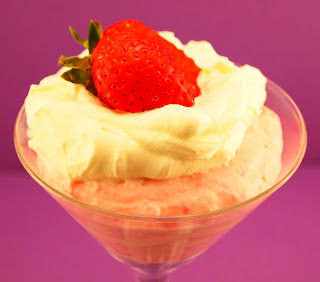
Strawberry Cheesecake Mousse


"Strawberries are the angels of the earth, innocent and sweet with green leafy wings reaching heavenward."

~Terri Guillemets


Oh I love Spring. Strawberries are definitely my favorite spring time food, and this mousse is one of my favorite things to do with those lovely berries.

Years ago a friend of mine and I made this, and her boyfriend ate so much of it, it gave him a stomach ache. He immediately went to walk it off. I remember it so vividly because I had never heard of someone going to walk after over eating to help him stop feeling that way. It makes sense I guess. But for me the last thing I want to do after being stuffed, is walking, I'm a lay on the couch kind of girl. That's probably why I struggle with my weight. Maybe I need to take up the practice of "walking it off".


This is a cinch to make, I mean really easy. It's a no cook recipe, so it's perfect for warm weather.

Only 5 ingredients too!


yum


adding the whipped cream


after folding in the whipped cream


If you are making this for eating after dinner, make sure you make it at least a few hours ahead. It needs to get cold and set up completely.

And if you eat too much, go for a walk, I hear it helps.


Want another great, easy spring time pudding recipe?

Lemon Cream Pudding


Strawberry Cheesecake Mousse

makes 4 servings

Ingredients

8 oz (224 g.)  package cream cheese
10 oz. - 2 cups, ( 283 g.) fresh strawberries, stems removed, washed and sliced
1/2 cup (125 ml) 4 oz. heavy cream
1/2 cup (55g.) powdered sugar
1 tsp vanilla

more sweetened whipped cream for topping, if desired
more fresh strawberries for topping,  if desired

Directions

Place cream cheese, fresh strawberries, vanilla and powdered sugar in a food processor or blender. Puree them together until smooth. Then place the cream cheese mixture in a large bowl.

Whip the heavy cream just until stiff peaks form. Fold the whipped cream into the cream cheese mixture.

Spoon the mousse into individual bowls, glasses or cups. Refrigerate a few hours before serving. Top the individual servings with sweetened whipped cream and a fresh strawberry.

springing...


Lemon Pistachio Tartlets + a confession + some news

tartlet pic
First the confession...
Have you heard of Food52?  I have and I have been secretly holding out on you because I want to to win and I would like to keep the entries to a minimum.  Okay, so I realized this was unfair of me and if you haven't, you should check it out.

It is a website that requests a certain type of recipe each week for a contest {for example: give us your best late winter tart recipe} and you have one week to turn in a recipe.  If you win, you are published in a cookbook that they publish once a year... get it? 52 recipes for 52 weeks= food 52.  Anyway, they upped the ante big time a couple of weeks ago and when they asked for late winter tarts, they announced that if you won, you would be flown to New York to be on the Martha Stewart Show to make your tart to help celebrate her new pie and tart cookbook.

I was beside myself. Being on the Martha Stewart show is on my bucket list and although I'm at the ripe old age of 26, you can never check things off too soon.  Anyway, I went to work on lots of versions of this original recipe and came up with my lemon pistachio tartlets.  By the time I finally turned it in, I really didn't have much hope of actually winning.  There seem to be true professionals on this site who have been entering for years and I was up against 265 other tarts.

No I did not win, but...
So when I found out I wasn't chosen as one of the top two to be voted on, I wasn't that surprised, but I had high hopes of being a part of the honorable mentions... aka editor's picks.  Food52 puts out a few of their picks of all the entries and asks members of the community to test them out.  Those that are given great reviews are picked as Editor's Picks.

So I am happy to say that I did get picked as an Editor's Pick! It was exciting for me and especially because I am still venturing into the world of making recipes my own.
tart pic

So all that to say, I just wanted to share a little foodie triumph and share this recipe that would be pretty darn perfect for brunch or shower.  I love easy, mini pick up food, which is why I insisted on these being mini and they turned out to be quite addictive too.

Just in case you want to check out other editor's picks, click here for a link to the blog post... 


Now for the tartlets...
lemon pistachio 2

peeled lemons


candied peels

crusts


Lemon Pistachio Tartlets
Recipe Note: If you would rather not mess with candied lemon peels, you can leave that garnish off, but I do like the extra layer of lemon myself. 
Makes 48 tartlets
For the crust and candied lemon peels:
  • FOR THE CANDIED LEMON PEELS
  • 3 large lemons (look for ones with thick skin)
  • 3 cups sugar
  • FOR THE CRUST
  • 3/4 cups unsalted butter
  • 1/4 cup sugar
  • 1 tablespoon powdered sugar
  • 2 cups all purpose flour
  • 2 teaspoons fresh lemon zest
  • 1 teaspoon almond extract
  • 144 whole roasted and salted pistachios, shelled (about 2 cups unshelled)
  1. Preheat oven to 325 degrees. Using a vegetable peeler, peel off pieces of the skin from top to bottom into long ribbons. Place peels in a saucepan and cover with water. Bring water to a boil and simmer for one minute. Drain water and repeat one more time. Dissolve 3 cups of sugar into 2 cups of cold water. Bring water to a boil and add lemons. Turn heat to low and let simmer for one hour.
  2. Meanwhile, melt butter in medium sized saucepan over low heat. Remove from heat and add sugars, zest and almond extract. Stir to combine. Add flour and stir with a wooden spoon until combined and crumbly. Let crust rest for 15 minutes.
  3. Spray two mini muffin tins with a good coat of nonstick cooking spray. After crust has rested for 15 minutes, spoon a heaping teaspoon of crumbly dough into each cup. The goal is to get the entire cup covered with the least amount of dough. Technique: Using your thumbs, press dough into the bottom of the pan. Then, use your thumbs to spread the dough up the sides until whole cup is covered evenly. Bake crusts for 8 minutes. Allow to cool and drop 3 pistachios into each cup.
  4. After lemon peels have simmered for an hour, remove from liquid and allow to cool. Cut peels into 1 inch chunks. Lemon peels will not dry out completely, but can be stored in an airtight container for up to two weeks.
For the filling, glaze and finishing touches:
  • FOR THE FILLING
  • 1 1/2 cup sugar
  • 3 tablespoons all purpose flour
  • 3/4 teaspoons baking powder
  • 3/4 teaspoons salt
  • 3 XL eggs, room temperature, beaten
  • 2 teaspoons grated lemon zest
  • 3 tablespoons fresh lemon juice
  • FOR THE GLAZE
  • 1/2 cup powdered sugar, sifted
  • 1 tablespoon fresh lemon juice
  • 1 tablespoon butter, melted
  • FOR FINAL TOUCHES
  • 1/4 cup powdered sugar
  1. Prepare filling while crusts are baking and lemon peels are simmering. In a medium sized bowl, stir together sugar, flour, baking powder and salt. Add eggs, zest and juice and stir to combine. Using a tablespoon, fill each crust cup with lemon filling. Fill to the top of the crust line, but do not go over. (if filling floods out over crust, it will be more difficult to remove from pan). Bake for 15 minutes. Remove from oven and cool in pan.
  2. Meanwhile, prepare glaze. Combine powdered sugar, lemon juice and butter in a small bowl. Using a pastry brush or small spoon, paint the top of each cooled tartlet with the glaze and place a sliver of candied lemon on top of each. Slide a small, sharp pairing knife in between the crust and pan until each tartlet pops out. When ready to serve, dust heavily with powdered sugar.
  3. Can be stored in an airtight container up to one week.

What A Week


Leftover Christmas Cake to the Rescue

It's been one of "those" weeks. 
First I jab my eye whilst gardening. 
See the doctor.   Eye Drops.  Painful. 
Then the courtcase.  Stressful.
Another day.  Unresolved.  Delayed till June. 
 A business trip ahead for Hubby. 
The day before he leaves he can't help himself.  Things to do. 
Working with machinery, he virtually pulls out his fingernail. 
Off to the hospital.  He winces.  Oh God.  Now that's painful! 
Does he lie down and relax for the remainder of the afternoon?  Nope. 
Off to the farm.   The heifer's need tick treatment. 
I race to get his antibiotics. 
 Next day he's gone. 
 I get an email. He's safe.  He arrived. 
 No mention of the finger - I did ask. 
 Another email.  Lovely shots of the wildlife in a lowlands reserve. 
Damn. Why didn't I go.  Hang on.  This was supposed to be a business trip!  
I guess it is Sunday. 
I go and check the cows.  No water in two of the troughs.  What now?  Help. 
Next day, clean up house. Cook a nice meal. 
The new boyfriend comes to meet us.  From Melbourne.  Must make an effort.
Today the eye is sore again.  I check.  B....... hell!   An ulcer.  A corneal ulcer. 
 I use old medication.  Too tired and couldn't be bothered going to the doctor again. 
Feeling a little emotional and sore and sorry. 
 Glad to be alone.
Glad to use my little blog as a sounding board.  

What does one eat during testing times? 
Thank goodness for puff pastry. 
Thank goodness for homemade frozen food.


Nothing pretty about cabbage rolls. 
They freeze well, taste good and are extremely healthy. 

Monday, March 28, 2011

Morning Mountainside In Montenegro


I had such a hard time trying to choose one of Mitchell's photos.  During our two week stay in the hills of Potrk, Montenegro, he would regularly get up early, grab the camera and go for a walk.   There were a couple of mornings where the fog was so thick, he tells me he could hardly see where he was going.  The relatives were very worried about him and they talked of sending search parties after he didn't return for hours.  I assured them he had an excellent sense of direction.  He came back every time to some very relieved looking faces and he must have wondered what was all the fuss about.  I later learn that brown bears and wolves once roamed these very same hills and mountainsides.  I emphasize the word "Once".  Still, one never knows.

If you are reading this my dear Nicole, then I would like to draw your attention to a few details that may interest an aspiring photographer such as yourself.  Sometimes, one has to make sacrifices for one's job.  In this particular case, one needs to rise early.  Five or six o'clock in the morning.  The cow milkers will be up.  For them it's a regular occurrence.  For you, getting up at this hour will most certainly present some challenges.  However, think of it this way dear.  This place has never before seen the likes of someone with the photographic equipment that you possess.  Most likely never will.  Tourists simply don't go out of their way to come to Potrk.  You could say it's a little off the beaten track.  My point?  Use your splendid gear, use your wonderful photographic eye, rise early and go capture those majestic mountain scenes in Montenegro that await you.  Especially on those hauntingly beautiful, foggy morns.  Mitch managed to get some rather nice shots with our very average camera.  I can only imagine what you can do.  Don't miss this opportunity!  You must sacrifice.  Get up early!

Hello Kitty Cupcakes!

I was going through some of my blogs and I realized that I never posted a blog on someone who is definitely unforgettable! Hello Kitty!!!!!!!

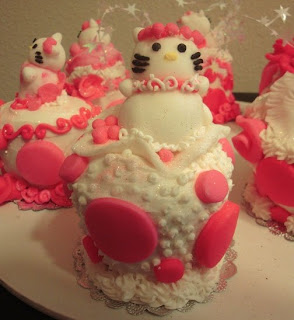
I am kind of famous for making Hello Kitty Cupcakes.

It started when I worked for Billabong and I made them for my boss's god-daughter.

They looked so lifelike and cute that my friend Jennie ordered some too for her daughter's birthday.

..and this past fall, I was given the chance to make a *huge* Hello Kitty Giant Cupcake for a sweet girl named Jen.  (who in the end I don't think ended up eating much of the cake because she thought it was too pretty to eat and wanted it on display!)

My inspiration for Hello Kitty cupcakes:


Hello Kitties sitting on fluffy marshmallow white flowers

Pink Adorable-ness.

A Garden of Daydreams.

If Hello Kitty had wings..she would look this cute!

Smiles, Sparkles & Stars.

Party in the front, Party in the back!

Mini Umbrellas and Giant Pink Bows.

Smiles, Sparkles, and Stars.

Ready to Shine.
Mountains of Love.
Islands of cute. and polka dots.
Accessorized.

A Giant Cupcake Bouquet of Happy-ness.